Introduction

In the 1960’s, my grandmother, Vincenza, had returned to Boston’s North End, the neighborhood where she had first arrived in America. She had come full circle, having arrived in the North End in 1914 to find a filthy, overcrowded slum, to achieving the American Dream and owning a home in the suburbs to finally coming back to the place that felt comfortable and safe and reminded her of Italy as much as any American neighborhood could.
By this time, the North End had progressed from the run down slum it once had been to a tourist attraction for visitors to Boston. People came in droves to visit the small specialty shops along Salem Street, eat in the many restaurants that served regional dishes from all over Italy and to experience the sense of community that had grown and developed over the decades since Vincenza first arrived in Boston.
Walking up the four flights of old wooden stairs to my grandmother’s apartment, I could smell the food cooking from the apartments that lined both sides of the long hallways. The air would be filled with the mouth watering aromas of garlic frying in olive oil, peppers roasting and fresh bread being baked. My grandmother’s kitchen was always rich with the aroma of tomato sauce simmering on the stove, anise cookies baking in the oven and the light, sweet scent of ricotta mixed with eggs and parsley.
I spent hours in my grandmother’s kitchen watching her prepare meals; recipes and techniques passed down from her mother, Lucia; meals that she learned to prepare in an old stone kitchen over an open fire back in “the old Country”, Abruzzi. It seems that there was a story or some type of folk lore to go with every meal she prepared. I loved listening to the stories as much as I loved helping to prepare and eat the food.
The recipes I learned from my grandmother are the recipes of the peasant farmers, sheep herders and laborers of Abbruzzi. They are recipes developed out of necessity; the need to use every bit of food available and waste nothing; the need to find a way to fill your family and keep them nourished even when food and money were scarce. These are not gourmet recipes that use expensive, trendy ingredients. I am not a professional chef. Hopefully, you will enjoy the idea of making comfort food, plain family friendly meals, some of which go back centuries and have their roots in ancient Roman times. I learned that food was something to be fully experienced with all the senses. A meal was meant to be made from scratch, using the freshest ingredients possible. It was meant to be made with love and it was to be shared with family and friends, relished and savored. A full day could go into the preparation of a meal that would be served with pride and love to the family and friends gathered at the table. A meal was a social event; a time to sit around the table, talk, laugh and unwind.
The preparation of food was an art in itself. Food incorporated all the senses. One not only paid attention to taste, but also to the aromas, textures, appearance and sometimes even the sound of food. My grandmother never wrote down or read a recipe. All the knowledge of cooking was stored in her head. She learned to cook from instinct, using all her sense to determine what flavors would work together. I learned to cook the same way my grandmother and great grandmother did. Measurements consisted of a pinch, a bit and a handful.
I cannot begin to explain how difficult it is for me to write the recipes for this blog and for the upcoming cookbook. I learned to measure with a pinch, a handful, a little of this and a generous amount of that. Taste, sight and common sense told me whether or not the amount was right. In writing a cookbook, I had to prepare my grandmother’s and great grandmother’s dishes, trying to measure ingredients to make it easy for others to follow. I learned that this is easier said than done. Half way through the preparation, I realized that I was reverting to instinct and forgetting to measure. That’s what Italian cooking is. You learn to use all your senses to create a meal and you eventually know what flavors will complement one another.
Therefore, in reading these recipes and trying them out, you cannot take the measurements as absolute, but rather as guidelines for amounts. In some cases I have state that you should use a pinch or a bit of an ingredient. This will no doubt cause panic for some people who tend to worry too much about whether or not they are doing it right. These people are missing out on the joy of cooking and the opportunity to develop an intimate relationship to the food. I hope that anyone reading this will eventually try to let loose and have some fun cooking. Learn to trust your instincts, learn to uses all your senses in cooking, and learn to cook like an Italian.


Showing posts with label cooking. Show all posts

Sunday, December 8, 2013

Grandma Vincenza's Lasagna

Grandma Vincenza’s Lasagna

This is by far the best lasagna I have ever had. Of course, I am biased, having grown up with it, but whenever I have made it for friends, they always love it and want the recipe. The key to this thick, rich tasty lasagna is a perfectly seasoned ricotta mixture blended with lots of garlic, romano and mozzarella cheeses. My grandmother also blended some of the tomato sauce into the ricotta mixture rather than just lay it on top.

Ingredients
1 box of lasagna noodles
32 ounces of part skim ricotta
2 eggs
3 cloves of garlic
24 ounces of tomato sauce
1 tablespoon of dried parsley
1 tablespoon of dried basil
1 teaspoon of salt
1 teaspoon of black pepper
1 cup of shredded mozzarella to mix in
½ cup of shredded mozzarella to top
½ cup of grated romano

Boil a quart of water in a large pot and cook the pasta until it is tender but overly cooked and soft
Drain the pasta and set aside to cool
In a large mixing bowl, blend the ricotta and eggs. It is best to this by hand using a wooden spoon
Mix in the salt, pepper, basil and parsley
Using a garlic press, crush the garlic into the ricotta and the mix it in
Add the parmesan and 1 cup of mozzarella and blend everything together completely

Mix in a few tablespoons of the pasta sauce. You should end up with a creamy, pink ricotta mixture the texture of a cake batter
SPREAD A THIN layer of tomato sauce over the bottom of a glass baking dish
Put down one layer of lasagna noodles. Lay the side by side, overlapping a bit until the bottom of the baking dish is covered
Spoon in some of the ricotta and carefully spread it out over the noodles. Be sure to cover all the entire layer of noodles
Put a few more spoons full tomato sauce over the layer of ricotta an spread that out
Place another layer of noodles over this and continue as above, making layers of noodles cheese filling and sauce
The final layer should be a layer of noodles covered with a generous amount of sauce
Place the pan into an oven that has been preheated to 450
Bake o 30 minutes, remove from the oven and sprinkle the ½ cup of mozzarella over the top
Lace the lasagnas back in the oven and cook another 15 minutes
Remove from the oven and allow the lasagna to settle for about 10-15 minutes before serving


Monday, July 29, 2013

Espresso Pudding with Hazlenut Cream

Nothing went to waste in my grandmother’s house, including left over coffee after company had visited. This recipe has been modified and uses instant espresso to make the preparation simpler and quicker. Makes 4-5 servings


Ingredients
4 cups of whole milk
1 cup of sugar
5 tablespoons of cornstarch
2 tablespoons of butter
8 teaspoons of espresso powder or instant espresso

Mix together the sugar, espresso powder and cornstarch in a bowl and set it aside
Heat the milk and butter in a sauce pan until small bubbles start to from around the edges of the milk
Lower the heat and begin to add the dry ingredients a little at a time, whisking constantly as you add
Continue cooking until the pudding begins to thicken and starts to bubble in the center
Remove from heat, pour into small dessert bowls or ramekins and chill in the refrigerator for at least one hour

Topping
Ingredients
6 ounces of whipping cream
¼ cup of confectioners’ sugar
2 teaspoons of hazelnut extract
Mix the ingredients together in a bowl and, using an electric mixer, beat until the cream thickens. Do this just before serving the pudding so that the whipped cream holds up
Spoon onto the pudding and sprinkle on some crushed hazelnuts or shaved dark chocolate

Tuesday, June 7, 2011

Roasted Peppers

Roasted peppers can add a wonderful flavor to so many dishes and they are deceptively simple to prepare.
Back in Pianella, my great grandmother, Lucia, would roast sweet and hot peppers in a a huge, open fireplace in the kitchen. My great grandfather, Panteleone, loved to eat the really hot Italian peppers with Lucia's rustic bread.
Choose peppers that have a nice, rich color to the skin and are unblemished and firm. I prefer the red and green bell peppers or the hot green Italian peppers. Other varieties, such as yellow and orange bell peppers can be used, but I find their more delicate flavors do not hold up as well when roasted.
Wash the peppers thoroughly and dry off excess water with a dish towel or paper towel. Place the peppers in a shallow broiling or baking dish or a cookie sheet. You can also place them directly on the oven rack.  
Set them in the oven close to the broiler and allow to cook until the outer skin of the peppers begins to bubble and char. As the skin begins to turn black, turn the peppers overs to allow the same to happen o the other side. Continue turning the peppers until you have achieved a nice burnt skin all over.
Note that it is almost impossible to get them cooked evenly and in a uniform manner. Do not worry about that.
Once they are cooked, remove the pan from the oven or broiler and allow the peppers to sit and cool so that you can handle them. Although the outside may be comfortable to the touch, the inside of the pepper may still be very hot. Cut them open carefully and, if the inside is still too hot to handle, allow them to sit longer.
Once you can safely and comfortably handle them, remove the stems which should now easily pull away.
Cut the peppers in half lengthwise and spread them open, outer skin down, onto a cutting board.
using a small paring knife, scrape away y the seeds and inside ridged fibers of the peppers and discard.
Turn the peppers over so that the outside skin in now facing up. Again, using a pairing knife, gently scape away the blackened skin. Don't be concerned that you are not able to scrape away all of it. In fact, I prefer to leave some of it as I feel it adds more flavor. You basically want to get rid of the bubbled, overly blackened areas. 
The peppers are now ready to be used in some of my recipes or to be eaten sliced into strips and tossed with crushed garlic and extra virgin olive oil. This tastes great when they are placed on a chunk of hearty, rustic bread.

Monday, December 27, 2010

Linda's 5 Cheese Eggplant Parmesan

This is a staple dish for gatherings in my family. A big Sunday or holiday dinner always includes eggplant parmesan. It is a bit time consuming to make, but you will realize it's well worth the effort when you slice into those thick, rich layers of delicious eggplant, sauce and cheese. Although my family uses this as a side dish to a large meal, it can be a meal in itself. It is rich and filling.


Ingredients:
1 large eggplant
4 eggs beaten
2 cups seasoned breadcrumbs
2 grated parmesean cheese
24 ounces of shredded mozzarella
1/2 pound of mild cheddar, sliced thin or shredded
1 cup of grated fontina cheese
1 cup of grated asiago cheese

For those who noticed, no, cheddar is not a cheese normally used in Italian cooking. My mother, Linda, modified the recipe because the sheep's milk cheese one would actually use can be very difficult to find outside of specialty cheese shop. The result was positive. The cheddar adds a nice, rich, creaminess.

Cut off the top and bottom, stem sections of the eggplant and peel away all of the purple outer skin. Some people leave the skin on. It is edible when cooked, but can also be very bitter. This dish works best with peeled eggplant. You don't want the bitter flavor to over power the dish.

Cut the eggplant into thin slices.

Beat the eggs and and place in a large shallow bowl.
Place about a half inch deep layer of breadcrumbs into a second bowl.

Dip the slices of eggplant, one by one, into the egg making sure to coat both sides completely.

Place the eggplant slice into the bowl of breadcrumbs and coat it completely on both sides. Continue this until all of your eggplant slices have been battered. As you continue breading each slice, the breadcrumbs will become gummy and stick together. When this happens and you are find it difficult to easily coat the eggplant, discard the breadcrumbs and put more into the bowl.

Once all the eggplant has been coated and is ready for cooking ready, fill a frying pan with enough oil to completely cover the eggplant slices. These are going to be cooked just a few at a time as they need to be placed in the oil in a single layer.
Place the battered sliced eggplant into the oil, as few at a time so as not to crowd or overlap them in the pan. This may take a while but it is important. otherwise the eggplant will not be evenly and fully fried and therefore will not have the proper taste and texture.

Keep the heat at low to medium low and fry the eggplant until until the breadcrumb coating has turned a deep golden brown. keep an eye on the eggplant while cooking as it is very easy to burn it. Once it has turned golden brown, remove the cooked slices immediately and place on a thick layer of paper towels or a clean dish towel to absorb excess oil. Again, this is an important step so that your end dish does not come out greasy.
Continue this until all the eggplant has been cooked and drained.

Assembling the Dish:
Take your baking dish and cover the bottom with a thin layer of pasta sauce. place the fried eggplant slices into a layer along the bottom of the baking dish. Add a generous layer the cheese mixture making sure to cover all of the eggplant. add a layer of sauce. repeat the layers until you have used all the eggplant. The top layer should consist of sauce and cheese.
Cover with foil and bake at 425 for 40 minutes or until done. When the cheese has melted and begun to brown and the layers underneath are bubbling, your eggplant parmesan is done. remove from the oven and allow it to set for about 10 minutes. This allows the layers to firm up so that they cane more easily be served

Eggplant facts and tips:

Eggplant is a member of the nightshade family of plants. It was once considered to be poisonous.
Even after being cultivated as an edible vegetable, Europeans still believed that consuming the skin would cause insanity. In fact, the skin is edible but it does have a strong, bitter taste.
Eggplant comes in hundreds of varieties, colors, shapes and sizes. The purple skinned variety is the one that most people probably know. It is the most common variety in the US and much of Europe.

Sexing your eggplant:

No, this has nothing to do with a kinky use for eggplant. Sexing an eggplant means being able to determine whether the fruit is male or female.
Why should you care about the gender of your eggplant? Female eggplants have more seeds than males. Seeds make for a more bitter taste and a higher absorption of oil. Eggplants love to suck up oil when they are being fried or sauteed. Females will absorb more than males.

In some dishes, the bitter female is preferred. This would especially true in some Greek and Middle Eastern recipes.
In an eggplant pamesan the male is a better choice. It will have a milder flavor that will blend better with the cheese flavors. It will also soak up less oil while frying and have a less heavy, oily texture.

Some people find eggplant to be harsh on the stomach. For those people the male eggplant  may be easier to digest. Personally, I always prefer a male fruit. It is milder and blends better in a dish like this without over powering the other flavors.

So, how does one sex an eggplant, a question I'm sure many of you have asked many times.

To determine the sex of your eggplant, look at the bottom end opposite the stem. If there is an indentation, like a navel, it is a female. The male's bottom should feel smooth.
Another way to sex an eggplant is by weight. If you pick up two fruits approximately the same size, the lighter one is usually male.

Wednesday, September 22, 2010

Arancini

Wednesday was hot dog and rice day in the cafeteria of Saint Anthony School.


The boiled hot dog on a stale roll wasn't so bad if you loaded lots of mustard on it, but the rice was another story. It was a more than adequate helping of boiled white rice that had butter mixed in to moisten it. It tasted terrible and nobody wanted to eat it.
My first Wednesday at Saint Anthony, I ate the shriveled, over boiled hotdog and strolled casually to the end of the cafeteria to scrape the white, tasteless mound of rice into the garbage can.
“What do you think you are doing, mister?”
It was Sister Mary Gemma, the meanest nun at Saint Anthony. Sister Mary Gemma was constantly armed with a five foot wooden rod that she handled the way a Samurai Warrior handles his sword.
“I don’t like rice,” I said. “So, I’m throwing it away.”
Sister Mary Gemma stuck the end of her wooden rod against my chest, barring me from getting any closer to the garbage can. “Are you aware that there are children in China who are starving and would love to have that rice,” she asked.
“I think they have lots of rice in China, Sister.” 
A few minutes later, while the other kids were out in the school yard for recess, I sat in the empty cafeteria with the plat of rice in front of me, my hands still stinging after being hit with Sister Mary Gemma’s rod. Finally, Mrs. Manzione, one of the cafeteria workers, took pity on me. As she wiped down the tables, she stealthily grabbed my plate and emptied it in the trash can she dragged around with her.
Week two, I had come up with the plan of placing my napkin over the rice before taking my plate to the back of the cafeteria. I thought surely Sister Mary Gemma would be fooled by the ingenious deception. As I sat nursing my red, swollen hands, Mrs. Manzione, again, emptied my plate.
“You know,” she whispered to me, “you could just do like the other kids and force yourself to eat the rice.”
Being too stubborn to give in, I finally developed the perfect plan. The next Wednesday I was out in the schoolyard with the other children, leaving Sister Mary Gemma smiling smugly in the cafeteria, believing she broken yet another willful child.  
When I got home that afternoon, my grandmother was perplexed as to why the pockets of my uniform jacket were filled with rice. I explained that rice was the most disgusting food ever invented and that if there really were starving children in China, as the nuns always reminded us, it’s because they would rather starve than eat that foul creation. 
I swore I would never eat rice.  My grandmother took this as a challenge and assured me that she could make a rice dish that I would love.


I realized she was right when I tasted my first arancini.


Arancini is a simple rice ball comprised of boiled rice, ham, peas and cheese, coated with breadcrumb and fried.


These can be made as an appetizer, a side dish or a snack. They can eaten as is or covered with tomato sauce. They do freeze well and can be reheated in an oven. Microwave reheating breaks down the texture, substance and flavor, leaving them bland and rubbery.

There are many variations on the recipe. This is how my grandmother made them.


Ingredients

1 tablespoon olive oil

1 onion, minced

1 clove minced garlic

1 cup rice

1/2 cup frozen peas

2 ounces of ham diced
1/2 cup finely grated Parmesan or Romano cheese

1 egg, beaten

1 egg

3 tablespoons of milk

4 ounces mozzarella cheese, cut into small cubes

1/2 cup flour

1 cup seasoned bread crumbs

1 cup vegetable or canola oil


Directions

Cook the rice according to directions. You can use chicken broth in place of water to cook the rice for some extra flavor. While the rice is cooking, you can start the onion and garlic.


Heat the olive oil over medium heat. Add onion and garlic, and cook, stirring frequently until onion is soft. You do not want to brown the onion and garlic.


Mix the cooked onion, garlic into the rice along with the peas and ham.

Allow the mixture to cool enough to add the egg without cooking it and to be able to handle the mixture. Do not let it sit long enough for the rice to dry.


Stir in the beaten egg


Form the rice mixture into balls. These can be small, appetizer size or larger, depending on how they will be served and how big you prefer your balls. Some people like large ones and some people like smaller ones that fit easily into the mouth.


As you form each one, press a chunk of the mozzarella into the center.


Put the milk and the bread crumbs into two separate shallow bowls.


Dip the rice ball into the bowl of milk, coat lightly with flour and then roll it in breadcrumbs and coat well.


Heat the frying oil in a deep saucepan or deep fryer and fry your balls a few at a time, turning frequently. When done, your balls should be a golden brown color.


Set them on a paper towel or dish cloth to drain. Eat as is or cover with tomato sauce.

Monday, September 20, 2010

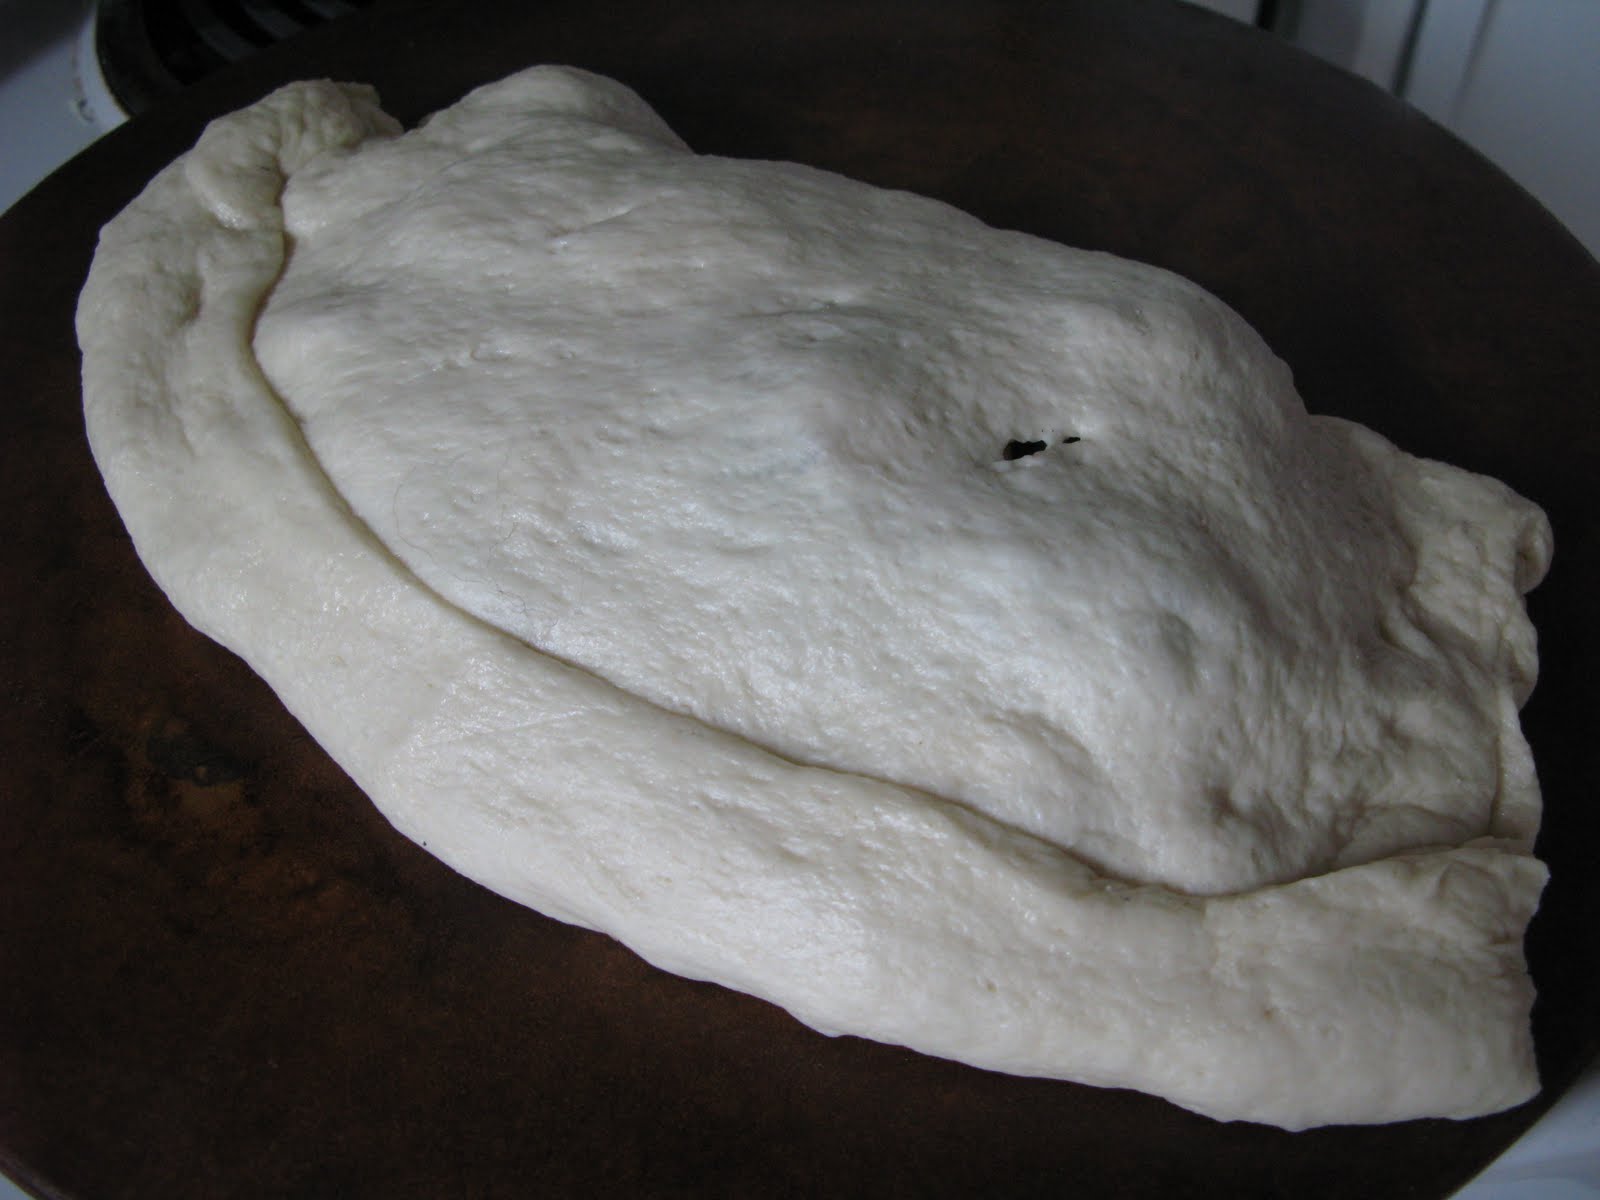
Pizza di Scarola


This is something my grandmother made frequently and would keep on hand in the freezer because it was always a favorite. It can be made with escarole or, if you prefer, spinach works just as well.  It was one of the sneaky ways my grandmother had of getting me to eat the nutritious foods that children normally avoid. Presenting it the form of a calzone or pizza could make leafy greens very appealing.

Ingredients:
6-8 ounces of uncooked, fresh spinach
1/3 cup parmesan cheese
1/3 cup mozzarella cheese, shredded
1/2 cup sliced white mushrooms
1/2 cup sliced onion
1/3 cup extra virgin olive oil

Saute the onion until it becomes tender and translucent. Just a few minutes before that point, add the mushrooms to the pan and saute until they start to turn a golden color. 


Spread the dough out onto a pizza stone or aluminum foil that has been oiled with cooking spray and covered with a dusting of flour or cornmeal.

Spread the spinach over half dough leaving a quarter of an inch at the edge.


Sprinkle on the mozzarella and parmesan.

Spoon the mushrooms and onion over the spinach.
 
Take the other half of the dough and fold it over the spinach and mushroom mixture to form a half moon shaped pie.

Go around the edges pressing the dough together to form a seal. Place a few small slices in the top to vent steam.


Bake at 325 degrees until the dough has turned a deep golden brown.


Allow to set 5-10 minutes before slicing.


This is delicious hot or cold. It can also be served with a bit of tomato sauce spread over the top.

Sausage Soup


This is another hearty, filling soup that goes along way. Again, this is a recipe I have simplified from the way my grandmother made it and certainly from the way my great grandmother would have. My grandmother, Vincenza, bought dried beans and soaked them for 24 hours them simmered the for half a day. My great grandmother Lucia, picked the beans from the garden.
It can be made with either sweet or hot Italian sausage. Although I love hot, spicy foods, I prefer this soup with the sweet sausage. It tends to blend better with the other flavors rather than trying to compete with them.

Ingredients:

1 pound Italian sausage
2 clove garlic, minced
2 cans beef broth (14 ounces)
1 can crushed tomatoes (14 ounces)
1 cup sliced carrots
1 can of great northern beans or cannellini beans, undrained
2 small zucchini, cubed
1 medium onion sliced
Directions
Brown the sausage and saute the garlic and onion with it. Do not brown the garlic and onion, just cook until the onion is soft and translucent.
Slice the sausage into 1/4 inch slices.
In a large soup pot mix together the broth and tomatoes. heat on high until the liquid gets just about to the boiling point. Reduce heat and add the sausage, carrots, onions and garlic.
Allow this simmer 15-20 minutes.
Add the zucchini and beans along with liquid from the can.
Continue to simmer, on low heat, for another 20 minutes until sausage is completely cooked and the vegetables are tender.

Add salt and pepper to taste.

Tuesday, September 14, 2010

Simple Polenta

I was shocked the first time I saw polenta show up on the menu of a fancy restaurant as a side dish. Polenta has it's origins on the farmlands of Italy as a means to feed and fill a family when there is little food with which to work.

Polenta is basically a cornmeal mush that has been baked with tomato sauce and cheese. It is relatively simple to prepare. The way my grandmother prepared it was to mix tomato sauce directly into the polenta before baking. Most recipes call for it to be poured over the top only.
Ingredients:

1 3/4 cups cornmeal
6 cups water
1 cup tomato sauce
1/4 cup shredded mozzarella

Bring water to a full boil. Reduce heat and add cornmeal, whisking in a little at a time.
Cook about 10-15 minutes until the mixture it is the consistency of cream of wheat, stirring frequently.
Pour into a large mixing bowl and stir in 1/2 of the tomato sauce and the grated Parmesan cheese.
Once the ingredients are well mixed, pour into a baking pan or casserole dish that has been well greased or sprayed with cooking spray.

Spread a layer of tomato sauce over the top and sprinkle on the mozzarella.

bake at 400 for 20-30 minutes or until the polenta has firmed and the mozzarella has melted.

Allow to set for 5-10 minute before serving.

Cut into squares to serve.

Veal Stew (Stufato del Vitello)

This was a favorite of mine as a child. My grandmother made this frequently and served it with large chunks of crusty, rustic bread for sopping up the soup at the end.

This is a light, savory stew that is perfect for a cold day. It can be made in a hour or can be left to simmer longer than that. Once this starts to simmer, your whole kitchen will fill with a rich aroma that will draw the family (and possibly some neighbors) to the kitchen.

My grandmother and great grandmother would buy fresh peas still in the pod and spend hours shucking them. In this version, frozen peas will suffice. If you plan to use canned peas, not only will you end up with that aluminum taste overpowering the stew and ruining it, you will also end up with peas that are pretty much pureed.

Sorry, I think canned vegetables are the work of the devil. Fresh is, of course, always the first preference. Frozen is second.

Ingredients:

1 pound of stewing veal
2 white potatoes cut into chunks
1 large onion sliced
2 cloves of garlic crushed
3 cups of water
1 cup of crushed canned tomatoes
1 teaspoon of parsley
1/2 cup of diced sun dried tomatoes
1 box of frozen peas
1/3 cup cooking oil

Heat the oil in a good sized skillet. Once the oil is hot (it will start to pop and sizzle) place the onion, garlic and veal into the skillet and cook until the meat has browned and the onion and garlic has become soft.

Do not over cook the garlic and onions. You are not browning them nor are you cooking the veal all the way through. You simply want to lock in the flavor and juices of the veal and release the flavor of the garlic and onion.

In a large soup pot, add water and tomatoes together, put in the parsley and sun dried tomato and stir to mix all ingredients.

Put the veal garlic and onion into the pot and add the potatoes. Set on the stove at a low to medium heat, cover and allow to simmer.


This should be left to simmer for an hour.

Do not put the peas into the pot until 5-8 minutes before cooking time ends. This allows them to maintain their color and texture without overcooking.

Serve this steaming hot with a big loaf of rustic bread.

Braciole (Herb Stuffed Steak)

Braciole is a stuffed flank steak. Many of the braciole recipes are a bit more complicated than this one. The way it was made in my family was to keep it simple and prepare it so that it could be put into the Sunday Gravy to simmer all day. The reason for keeping it simple was that, as well as the gravy itself, the meatballs, sausages, pork and braciole  were all going into the pot.

Another way to enjoy this dish, if you are not making a large pasta sauce,  is to serve the braciole topped with a bit of sauce and a sprinkling of a nice Parmesan reggiano cheese.

Ingredients:

1 pound or more of flank steak
1/2 cup of diced sun dried tomato
1/2 cup diced onion
2-3 cloves garlic crushed
1 teaspoon of parsley
1 teaspoon of dried basil or 4 leaves of fresh basil diced
1/4 cup extra virgin olive oil
1/4 cup grated Parmesan

Lay the flank steaks out flat and tenderize with a mallet.

In a bowl, mix all the other ingredients. Spoon out this mixture onto the lower portion of each steak, about a tablespoon full for each. Pull the sides of the steak inward over the stuffing and proceed to roll the steak up into a tube shape.


Quick meal method:
Spread a thin layer of tomato sauce onto the bottom of  a shallow baking dish. Lay the stuffed braciole inside the baking dish. Do not layer on top of one another. Cover with tomato sauce and any left over stuffing you may have. Cover with foil and bake at 350 for one hour.

Cooking in a gravy:
If the braciole is going to be cooked in a sauce, you will need to tie each one with twine wrapped end to end. this will keep the steak from unrolling in the sauce. Place into your pot of sauce and allow it to simmer for a few hours.

These can also be cooked in a slow cooker. Provide enough sauce to keep the meat completely covered during the cooking time.

An alternative is to use a slightly thicker steak, such as a top round thinly sliced. using all of the ingredients above and adding a cup of seasoned bread crumbs to the stuffing mix. This will result in a larger, stuffed steak that is better for slow cookers or cooking slowly in an oven than it would be for a gravey.

Summer Salad with Peaches and Figs (Insalata di estate con le pesche ed i fichi)

This is a very simple salad that incorporates some of the flavors of an Italian summer. My great grandmother, Lucia, would put together this salad with fruits and vegetables picked fresh that morning. Some cured meats, a wedge of cheese and some fresh baked bread would accompany the salad and  for a lighter meal during those hot days in the Italian summer. My grandmother a sable to serve the same meal with everything chilled, something my great grandmother could not do until coming to the United States.
The dressing for this salad calls for an apple cider or red wine vinegar. Apple cider and red wine vinegars are light and fresh tasting. They blend well with the fruits and vegetables in a salad without overpowering them. For the same reason, a lighter tasting oil than an extra virgin should be used. This can be light to or pure olive oil or even a vegetable or canola oil.
The idea of this salad is to use the garden fresh flavors, mixing sweet, savory and a bit of tang.
Ingredients:
1 bunch of romaine lettuce
1 bunch of radicchio
2-3 fresh ripe tomatoes
1 large cucumber
2 ripe peaches
4 fresh figs quartered
1/2 cup oil
1/3 cup apple cider vinegar or red wine vinegar
1 tablespoon lemon juice

Wash the romaine and radicchio well and let dry.
Cut tomatoes, figs and peaches into quarters. The peaches should be ripe but not too soft.
Tear the romaine and radicchio into  a large salad bowl.
Add the quartered figs, peaches tomatoes and sliced cucumber.
Mix together the vinegar, oil and lemon juice, pour onto salad and gently toss.
Other fruits that go well in this salad and hold up with their own flavors are pears (either the Bosch or Bartlett variety) apples (Cortland, Empire or Granny Smith) and green or red grapes.
If you have never picked out fresh figs before, here are a few tips. Italian black figs or Mission Figs can be used. Mission Figs are often easier to find in most stores.
Choose fruit that has a mostly dark purple skin that is free of blemishes and has some firmness to it. After being washed, the entire fig, including the outer skin, is edible. If you find the outer skin to have a little bitterness, you can peel away the first layer.
The inside of a fig should be a rich purple  or magenta color and should look succulent and juicy, not dried out.